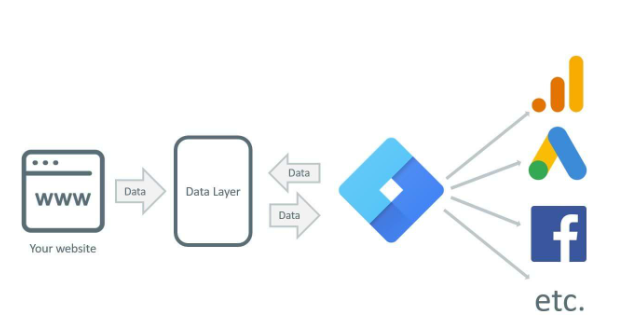
Goal: Google Tag Manager is a tag management system that stores and manages marketing tags and third-party code snippets. But First Need to verify GTM.
Pre-requisites or requirements: You need website to verify GTM.
Why this is important: After Verify GTM,you will Fire all type of tag With the Help of GTM.
When this is done: One time for Every Website.
Who does this: The person responsible for SEO Expert.
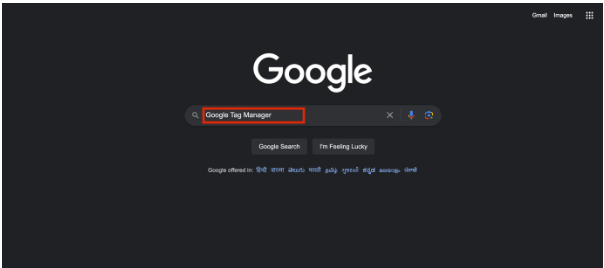
STEP 1 : Go to Google & Search Google Tag Manager.
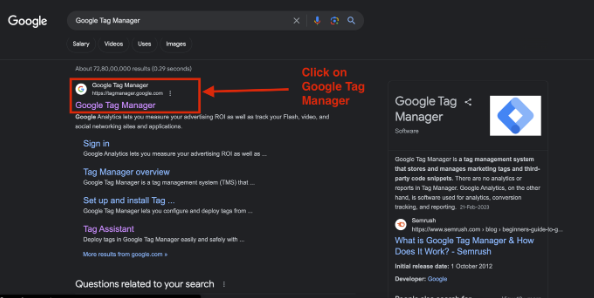
STEP 2 : Click on Google Tag Manager
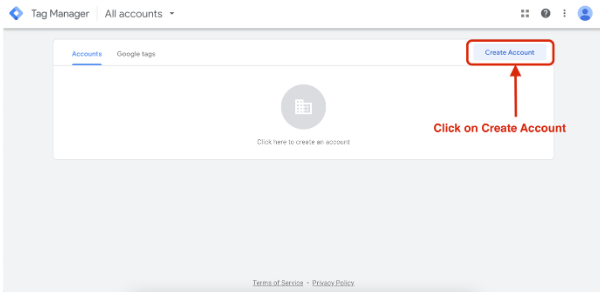
STEP 3 : Click on Create Account.
STEP 4 : Fill All Below Details.
Like : . Your Website Name . Select Country . Fill Website URL
STEP 5 : After Web and Click on Create.
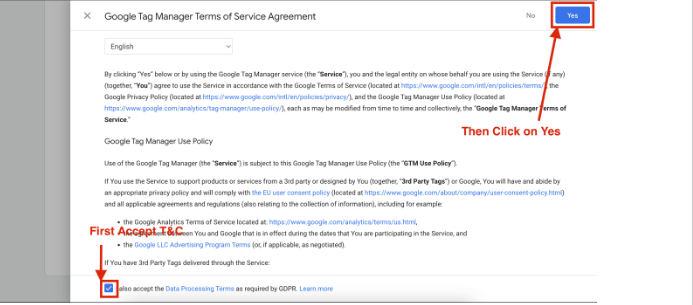
STEP 6 : After create, Accept all Term & Condition.
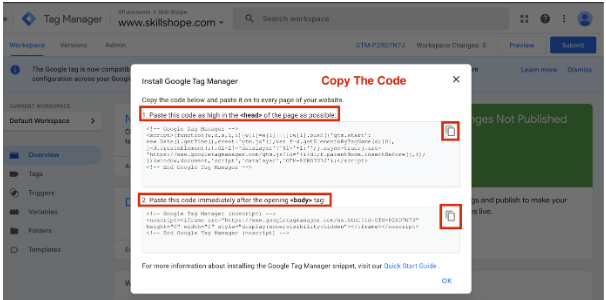
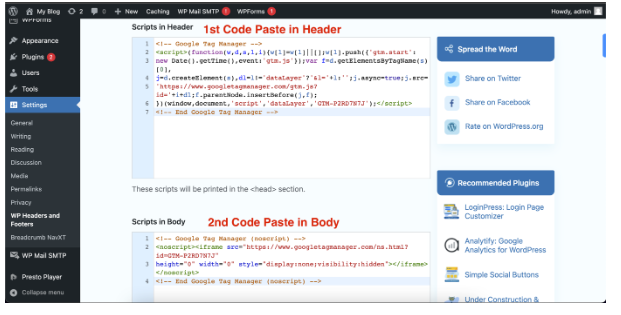
STEP 7 : After Creating Account, Copy Code & Paste in Head & Body Section.
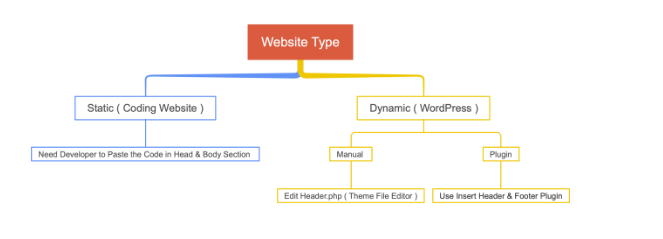
STEP 8 : Select Your website.
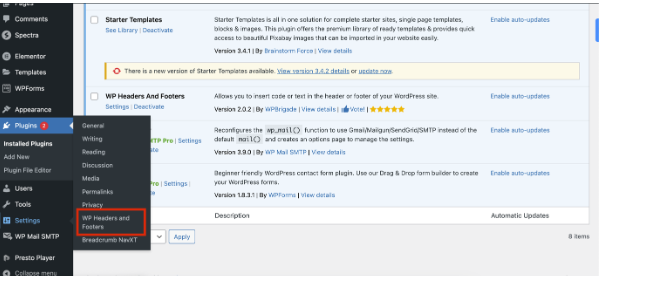
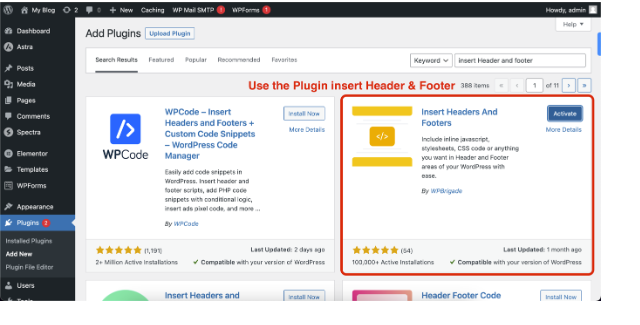
STEP 9 : In WordPress Website, First Install Plugin. Plugin Name: Insert Header & Footer.
STEP 10 : Install & Activate Plugin.
STEP 11 : Paste code in Header & Body.
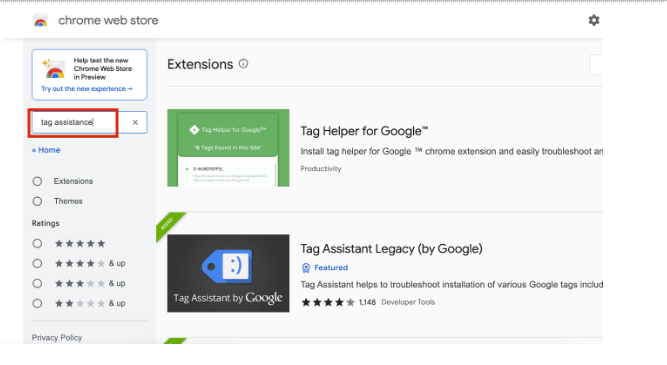
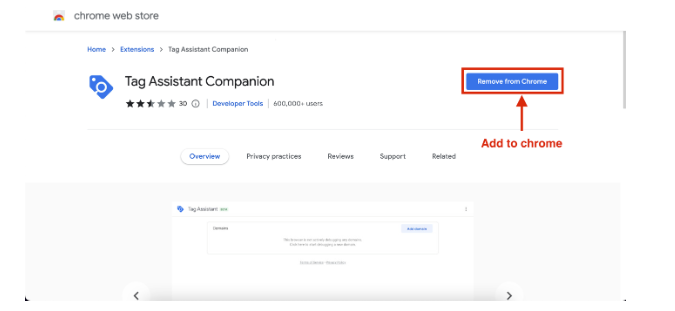
STEP 12 : After Insert Code, Need To Verify. After Insert Code Need To verify Code Work Successfully or Not. So, You Need a Chrome Extension the Name is : Tag Assistance Companion
STEP 13 : Add to Chrome the Extension.
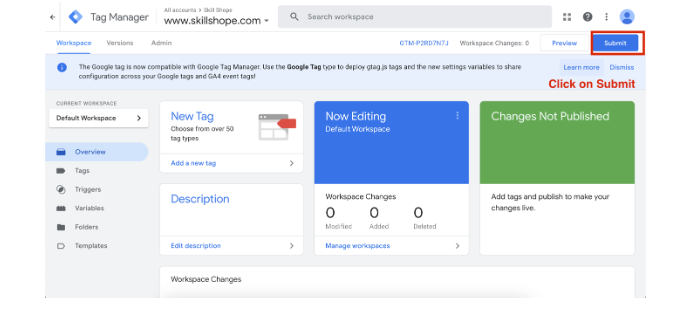
STEP 14 : Then Go to Your Tag Manager Dashboard & click on Submit
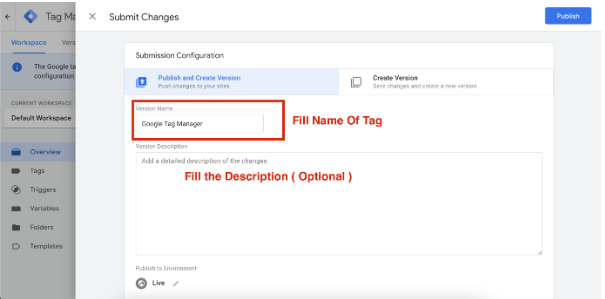
STEP 15 : Fill Your Tag Name.
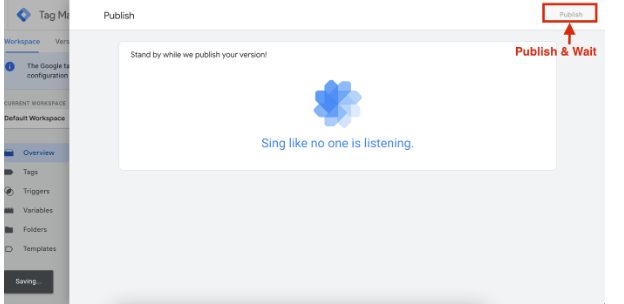
STEP 16 : Publish the Tag & Wait.
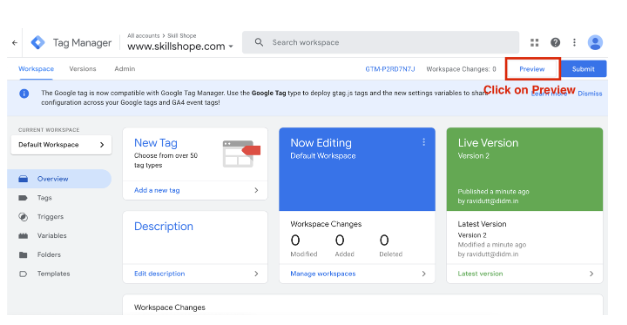
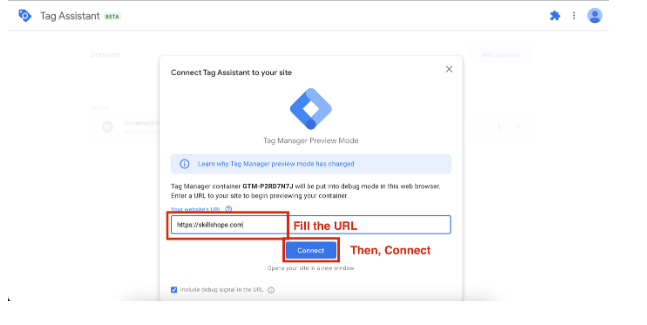
STEP 17 : After Submit, Click on Preview to Open Debug Mode .
STEP 18 : Fill Your Website URL.
STEP 19 : Hurray!!!, Your Tag Assistance Got Connected.